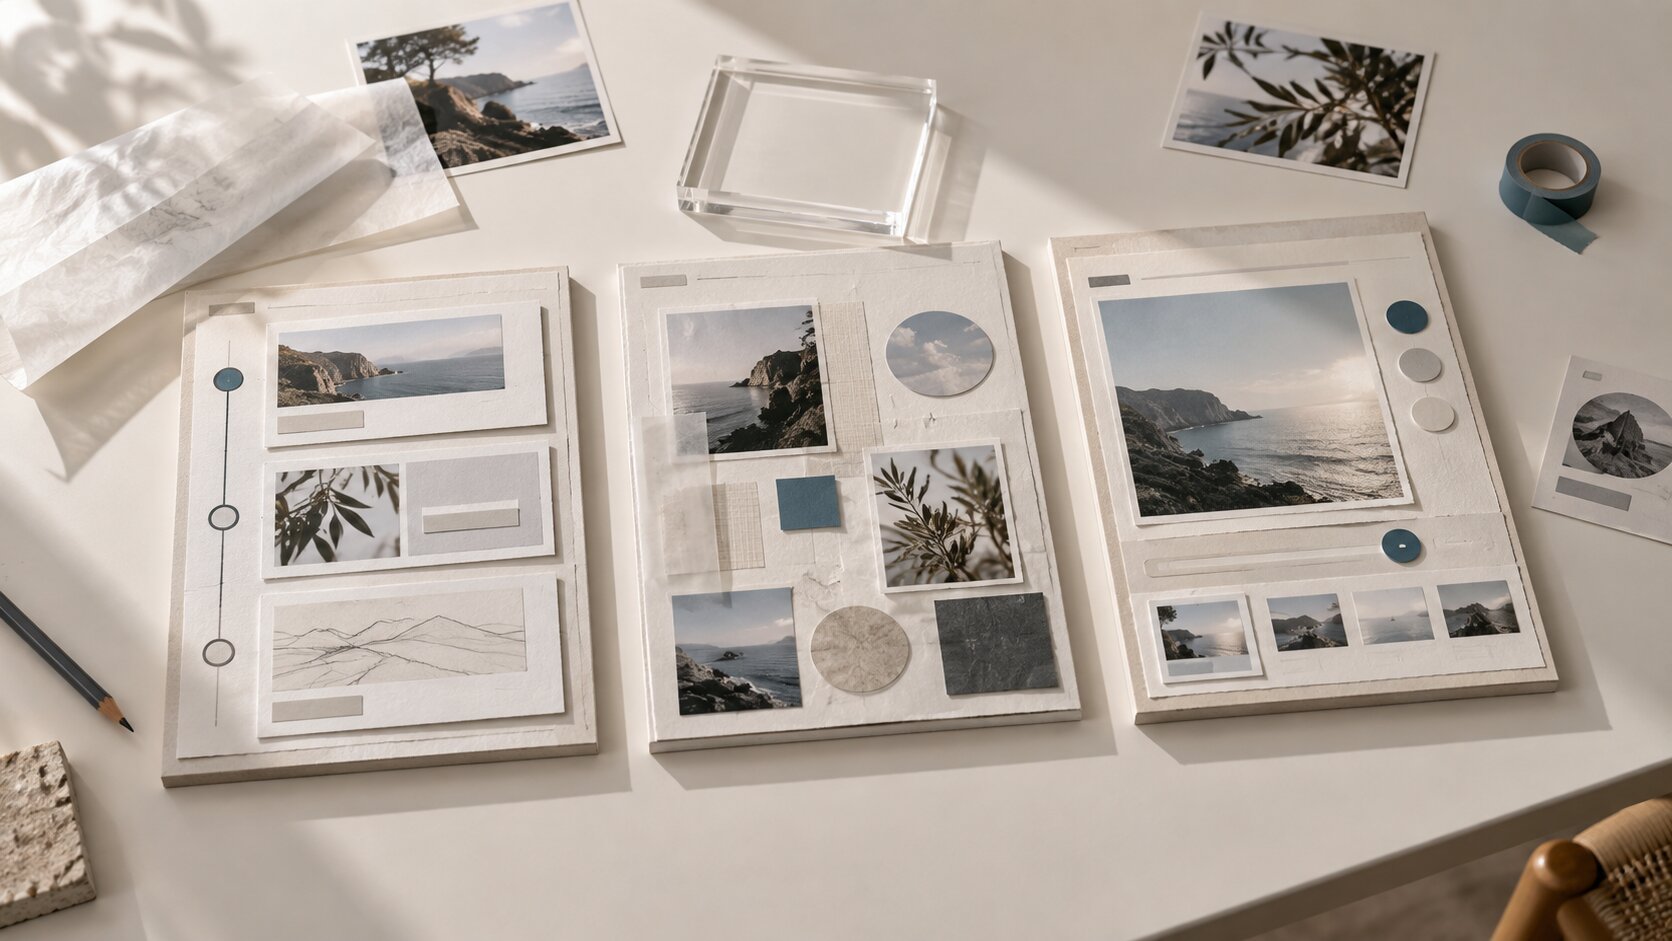
Product Education Visuals: Using AI to Make Complex Ideas Easy to Understand
Use AI to turn complex product ideas into clear educational visuals, explainers, diagrams and publish-ready creative assets.

TL;DR:
- Product education visuals help people understand what something is, why it matters, and how to use it without forcing them to read a wall of text.
- AI can help by turning rough notes, references, and messy product ideas into diagrams, explainers, visual metaphors, tutorial assets, and campaign-ready creative packs.
- The trick is to use AI for structure and exploration, then use human judgment to simplify, edit, check accuracy, and make the final visuals feel like your brand.
Some products are easy to show. A jacket. A guitar pedal. A print. A bottle. You can photograph it, crop it nicely, add a small line of copy, and people understand the offer pretty fast.
But some products are harder. A creative platform. A music release strategy. A workflow tool. A membership. A digital service. A feature that only makes sense after someone understands the problem first.
That’s where product education visuals matter.
For creators, artists, musicians, and small creative teams, the challenge usually isn’t “we need more content.” It’s more specific than that. You need visuals that explain what you do without flattening it. You need to make something abstract feel obvious. You need to help people get it quickly, especially on pages, social posts, release campaigns, pitch decks, and onboarding flows where attention is thin.
AI can help a lot here, but only if you use it carefully. Random prompting gives you random decoration. A clear workflow gives you visuals that teach.
Table of Contents
- Key Takeaways
- Start by deciding what the audience needs to understand
- Turn the product idea into one simple visual promise
- Use AI to explore explanation formats, not just image styles
- Build visuals in layers so complex ideas feel manageable
- Keep the visual system consistent across every teaching moment
- Review AI outputs like an editor, not a spectator
- Repurpose one explanation into a full product education pack
- How Orias AI fits into this workflow
- Frequently Asked Questions
- Sources Used
Key Takeaways
| Point | Details |
|---|---|
| Product education visuals need a teaching goal | Before making anything, decide what the viewer should understand after seeing the visual. |
| AI works best when the concept is already clear | Use AI to explore structures, metaphors, variations, and formats, not to invent the whole message from nothing. |
| Simple visuals are usually stronger than clever ones | A clean before-and-after, flow, comparison, or step-by-step visual often explains more than a dramatic abstract image. |
| Consistency makes learning easier | Reuse the same colors, symbols, composition logic, and visual language across explainers, posts, demos, and landing pages. |
| Human review is still necessary | AI visuals can look polished while still being confusing, inaccurate, off-brand, or too generic. |
| One core explanation can become many assets | A good product education idea can turn into a hero graphic, carousel, short-form video, demo frame, email visual, and onboarding image. |
Start by deciding what the audience needs to understand
Product education visuals fail when they try to explain everything at once.
That sounds obvious, but it happens constantly. A creator wants to explain the product, the feature, the use case, the audience, the emotional benefit, the workflow, and the pricing logic in one visual. So the final asset becomes crowded. Boxes everywhere. Arrows everywhere. Tiny labels. A nice background, maybe, but no real clarity.
Start smaller.
Ask one question before opening any AI tool:
What should the viewer understand in five seconds?
Not everything. Just the first useful thing.
| Product or offer | What the viewer needs to understand first |
|---|---|
| AI visual platform | “This turns rough creative ideas into clearer visuals.” |
| Music release campaign service | “This helps artists prepare visual assets before release week.” |
| Digital course | “This teaches one repeatable process, not random tips.” |
| Design subscription | “This gives you ongoing creative support without hiring a full team.” |
| Creator membership | “This gives you templates, references, and feedback in one place.” |
That first understanding becomes the visual anchor.
A good product education visual does not simply make the product look impressive. It reduces the distance between confusion and recognition.
This is where visual hierarchy matters. Nielsen Norman Group describes visual hierarchy as a way to guide attention toward the most important elements on a page through choices like scale, contrast, placement, and grouping. In plain language: people should know where to look first, second, and third.
For creators, that means your product visual should have one main idea, one focal point, and one clear path through the information.
Not ten competing ideas.
One.
Turn the product idea into one simple visual promise
A product education visual needs a promise, but not in the loud salesy sense.
The promise is the mental shift you want the viewer to make.
Before: “I don’t understand what this is.”
After: “Oh, I see how this helps me.”
That shift can be shown visually in several ways.
The before-and-after frame
This is one of the easiest formats because people understand contrast quickly.
For Orias AI, a before-and-after visual might show:
- Before: scattered references, rough mood notes, unfinished ideas
- After: a clean set of visual directions, release artwork, promo assets, and platform crops
The danger is making the “before” side look too messy or fake. Real creative work is often messy, yes, but it still has taste. Make the before state believable. A few unfinished notes. A loose mood. Half-formed direction. Not cartoon chaos.
The transformation path
This format shows how an idea moves through stages.
Idea → Mood → Direction → Assets → Publishing
This works well for tools, workflows, creative services, educational products, and anything that helps people move from uncertainty to output.
The mistake to avoid is adding too many steps. If the path needs more than five or six stages, split it into two visuals.
The simple metaphor
Some ideas are easier to understand through metaphor.
A “creative system” can become a set of matching physical surfaces.
A “workflow” can become a clean production table.
A “brand direction” can become a controlled palette, material, and lighting world.
A “product education journey” can become a sequence of visual doors, layers, or panels.
AI is especially useful here because it can help you explore metaphors quickly. But the metaphor has to clarify the idea. If it only looks cool, cut it.
A visual metaphor should make the product easier to understand, not more mysterious.
Use AI to explore explanation formats, not just image styles
A lot of people use AI like this:
- “Make this futuristic.”
- “Make this premium.”
- “Make this cinematic.”
- “Make this more engaging.”
That can produce attractive images, but product education needs more than style. It needs structure.
A better AI prompt starts with the teaching job.
Create a product education visual that explains how a rough creative idea becomes a finished campaign asset system. Show the process through four clear physical stages on a clean studio table. The viewer should understand the progression without reading text.
That prompt is already doing more work. It defines the idea, the format, the viewer takeaway, and the constraint.

Here’s a simple way to brief AI for product education visuals:
| Prompt element | What to include |
|---|---|
| Audience | Who needs to understand the idea? Beginners, artists, buyers, clients, subscribers? |
| Teaching goal | What should they understand after seeing the visual? |
| Format | Diagram, explainer scene, carousel, storyboard, product demo frame, landing page visual? |
| Visual metaphor | Path, layers, transformation, comparison, toolkit, system, map? |
| Brand mood | Calm, editorial, tactile, minimal, high-energy, playful, technical? |
| Constraints | No readable text, no fake UI, no clutter, no misleading product screens, no logos. |
| Output use | Blog hero, landing page, social carousel, onboarding, release campaign, short video frame? |
The most useful AI outputs usually come from prompts that sound more like creative direction than decoration requests.
Try asking for multiple explanation routes
Instead of generating one final visual immediately, ask AI for several possible ways to explain the product.
- Explain it as a step-by-step workflow
- Explain it as a before-and-after transformation
- Explain it as a visual system
- Explain it as a creator’s workspace
- Explain it as a set of modular assets
- Explain it as a journey from confusion to clarity
Then choose the route that feels clearest.
Not the prettiest. The clearest.
That distinction matters.
Build visuals in layers so complex ideas feel manageable
Complex ideas become easier when they are revealed in layers.
This is true in product design, education, video, and visual storytelling. If people see too much at once, they stop trying. If they see one clear layer, then another, they can follow.
For product education visuals, think in three layers:
Layer 1: The big idea
This is the first-read message.
Turn rough ideas into publish-ready creative assets.
This layer should be visible through composition alone. A scattered input area moving toward a clean output area. A raw material becoming a finished system. A single concept expanding into multiple formats.
Layer 2: The process
This shows how the transformation happens.
For a creative AI platform, the process might include:
- Add rough idea
- Add references and mood
- Generate directions
- Refine visual world
- Export campaign assets
You do not always need to show every step in one image. A carousel or short explainer video might be better.
Layer 3: The proof
This shows what the user gets.
For Orias AI, that might mean release visuals, promo assets, visual directions, voice variants, or a creative pack. For another product, it might mean templates, reports, clips, charts, onboarding screens, or a finished result.
The proof layer is where a lot of AI visuals become weak. They show “activity” but not outcome.
A creator does not only need to see that a tool does something. They need to see what becomes easier, clearer, or more usable because of it.
A small checklist for layered product visuals
Before publishing, ask:
- Can someone understand the main idea without reading the caption?
- Is there one obvious focal point?
- Are the steps in a logical order?
- Is the output shown clearly?
- Is anything decorative getting in the way?
- Could this visual be cropped for mobile and still make sense?
Meta’s creative guidance for Stories also points toward fast, concise scenes rather than slow, overloaded narratives, which fits this same idea: make each moment easy to read.
Keep the visual system consistent across every teaching moment
One product education visual is helpful.
A consistent set of visuals is much stronger.
If your landing page uses one style, your Instagram carousel uses another, your tutorial thumbnail uses another, and your onboarding graphics use another, people have to relearn your world every time. That adds friction.
A product education system should reuse a few recognizable choices:
| System element | Example decision |
|---|---|
| Color behavior | Warm neutrals with one deep accent color |
| Symbol language | Panels, paths, layers, material surfaces, reference objects |
| Lighting | Soft editorial light, not random neon glow |
| Composition | Clear center focus with generous negative space |
| Texture | Matte paper, glass, pigment, stone, fabric, or another repeated material |
| Output logic | Every final asset looks like part of the same creative family |
This is basically a small creative direction system.
Figma describes design systems as shared building blocks and standards that help keep experiences consistent and reduce repeated decision-making. Product education visuals can use the same principle, even if you are not building a software interface.
For an independent musician, that might mean every release explainer, lyric visual, merch preview, and campaign teaser shares the same lighting and texture language.
For a digital creator, it might mean every tutorial thumbnail, carousel, and landing page graphic uses the same diagram style.
For a creative team, it might mean every product education asset comes from one approved visual world instead of being recreated from scratch each week.
Consistency does not mean everything looks identical.
It means everything feels related.
Review AI outputs like an editor, not a spectator
AI can make a visual look finished before the idea is actually clear.
That’s the trap.
The lighting looks nice. The materials look premium. The layout feels polished. But the viewer still does not understand the product.
So review AI visuals with a simple editorial pass.
Check for accuracy
Does the visual imply something the product does not actually do?
This matters especially for AI products. Don’t show fake dashboards, fake analytics, fake “automated success,” or unrealistic outputs if those are not real parts of the experience.
Product education should build trust. Overpromising breaks it.
Check for visual noise
AI often adds extra objects because it thinks more detail means more quality. It doesn’t.
Remove:
- Random glowing elements
- Unreadable pseudo-text
- Busy interface fragments
- Too many icons
- Decorative charts that do not mean anything
- Objects that look symbolic but do not teach anything
Check for accessibility
If the visual explains important information, the surrounding page needs to support that information in text too.
Google’s image SEO guidance recommends useful, context-rich alt text and warns against keyword stuffing in alt attributes. W3C’s Web Accessibility Initiative also explains that images need text alternatives based on their purpose, and complex images may need longer descriptions near the image or elsewhere on the page.
In practical terms, don’t hide the whole explanation inside an image.
Use the visual to make the idea easier to grasp. Use nearby text to make the idea accessible, searchable, and clear.

Check for brand fit
Ask:
- Does this feel like us?
- Would we use this same visual language again?
- Is the tone right for our audience?
- Is it too generic?
- Is it trying too hard?
- Does it respect the creative world we are building?
Adobe’s writing around AI-assisted marketing workflows also emphasizes brand guidelines, templates, checks, and human review before publishing. That is a useful mindset for smaller creative teams too, even if your process is much lighter.
Human review is not the boring part.
It is where the work becomes yours.
Repurpose one explanation into a full product education pack
Once you have one strong explanation, don’t leave it as one asset.
Turn it into a small system.
For example, let’s say your core explanation is:
Rough creative inputs become a clear visual world, then a full set of publish-ready assets.
That can become:
| Asset | Purpose |
|---|---|
| Blog hero image | Sets the concept before the article begins |
| Landing page section visual | Explains the product workflow |
| Instagram carousel | Breaks the process into 5 swipeable steps |
| Short-form video storyboard | Shows the transformation in motion |
| Email header | Reinforces the core product promise |
| YouTube thumbnail | Makes the topic instantly readable |
| Onboarding graphic | Helps new users understand what to do first |
| Sales or pitch deck slide | Explains the product to partners or clients |
This is where AI becomes genuinely useful for creator workflows.
Not because it replaces the creative idea. Because it helps you adapt one idea across formats without starting from zero every time.
A practical repurposing workflow could look like this:
- Write the one-sentence explanation.
- Choose the visual metaphor.
- Generate a hero version.
- Refine the composition.
- Extract the style rules.
- Create format-specific variations.
- Add captions, alt text, and platform-specific copy.
- Review everything together before publishing.
The last step matters. Don’t review each asset in isolation. Put them side by side.
Do they still feel like the same product?
Does each format teach one clear thing?
Is the mobile crop readable?
Does the system feel intentional?
That side-by-side review is where you catch the small problems. A carousel slide that repeats the hero too closely. A thumbnail that loses the main shape. A landing page visual that looks nice but explains nothing. A short-form frame that is too detailed for a fast scroll.
AI helps you move faster, but publishing still needs taste.
How Orias AI fits into this workflow
Orias AI is built for the part of creative work where rough ideas need to become clearer visual worlds.
That makes it especially useful for product education visuals, because the hardest part is often not generating the final image. It is organizing the idea before the image exists.
You can use Orias AI to move from loose notes, references, moods, and creative directions into more usable visual concepts, promo assets, release visuals, campaign materials, voice variants, and publish-ready creative packs. For artists, musicians, and visual storytellers, that means your product or project can be explained through a consistent creative system instead of a pile of disconnected one-off assets.
The goal is not to make your work look like everyone else’s AI content.
The goal is to make complex ideas easier to understand while keeping your own taste, tone, and creative identity intact.
Frequently Asked Questions
What are product education visuals?
Product education visuals are images, diagrams, videos, carousels, or graphics that help people understand a product, feature, service, or workflow. They are not just decorative. Their job is to explain what something does, why it matters, and how someone can use it.
How can AI help make complex ideas easier to understand?
AI can help by turning rough notes into visual concepts, generating different explanation formats, exploring metaphors, creating layout variations, and adapting one idea into multiple assets. But the clearest results usually come when you give AI a strong teaching goal first.
What is the best format for product education content?
It depends on the idea. A before-and-after visual works well for transformation. A step-by-step diagram works well for workflows. A carousel works well for teaching one idea in stages. A short video works well when motion helps show change over time.
Should product education visuals include text?
Sometimes, yes. But don’t rely only on text inside the image. Keep image text minimal, readable, and easy to translate or resize. For web pages, support important visual information with nearby body copy and useful alt text.
How do I keep AI-generated product visuals consistent?
Use a clear creative direction before generating assets. Define your color palette, visual metaphor, composition style, lighting mood, texture, and output formats. Then review all visuals together as one system, not as separate images.
What mistakes make AI product visuals feel generic?
The most common mistakes are vague prompts, too many glowing effects, fake UI, random objects, crowded layouts, overcomplicated diagrams, and visuals that look impressive but do not explain anything. Generic output usually comes from unclear direction.
Can musicians and artists use product education visuals too?
Yes. A musician might use product education visuals to explain a release concept, merch drop, fan membership, listening experience, or behind-the-scenes creative process. Artists can use them to explain collections, commissions, creative systems, or digital products without making the work feel overly commercial.